

Creating a repository might seem very technical and a barrier to entry but it’s actually pretty easy if you follow these steps.
There are different sites who can help you with hosting and setting up a repository but one of the most populair ones is GitHub , that we’ll be using for the example.
Step 1
First , head over to the GitHub website here
Step 2
This will bring you to this page :

Enter your email adres ,create a secure password, a (public) username that you want to be associated with the account, and click on Create Account.
Step 3
Check your email and use the verification code
Step 4
Enter some personalization information (or skip them)
Step 5
Welcome to your GitHub page!
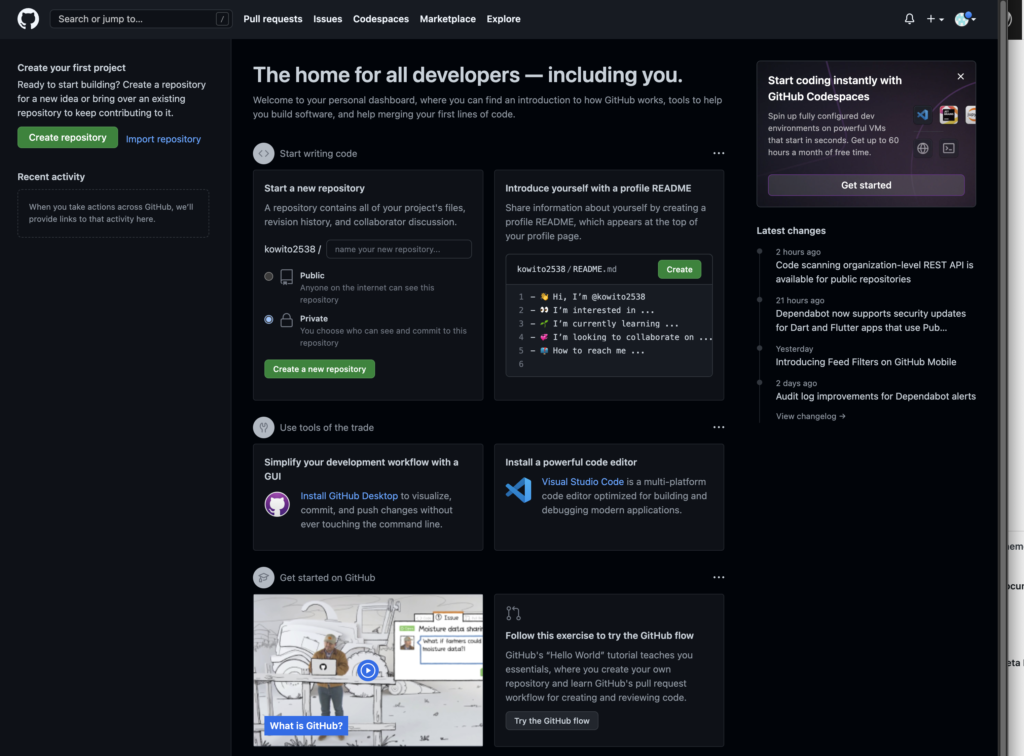
Step 6
On the top left , you can see the button Create Repository. Click on this to create a new repository.
Step 7
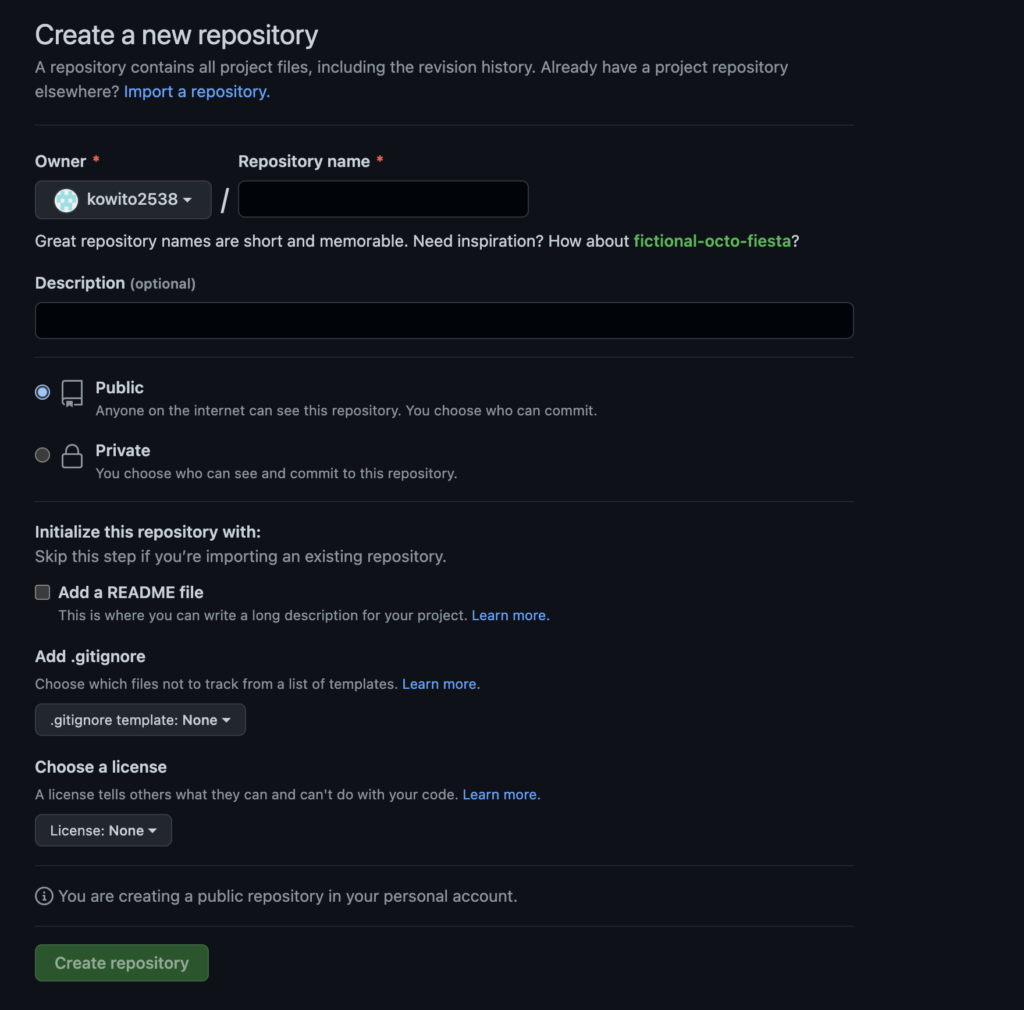
Set a name for your repository (like Frosty_Friday)
Include a Description and decide if you want this to be a private or public repository (Public repos are able to be seen by everyone, private is for those whom you invite. To post in a repo (committing) you always need to be invited).
If you’re happy with the information , just click on Create repository and you’ll be ready to go!
I’ve created my GitHub , now what?
You’ve got some options that you can choose from.
You can either use a program to manage your repository (like GitHub Desktop) , use an IDE that can connect directly to it so you can code and commit at the same time (like VS Code , a guide to which you can find here) or simply use the GitHub site to add new files.
For using the last option , simply click on Add File

And select ‘Create new file’.
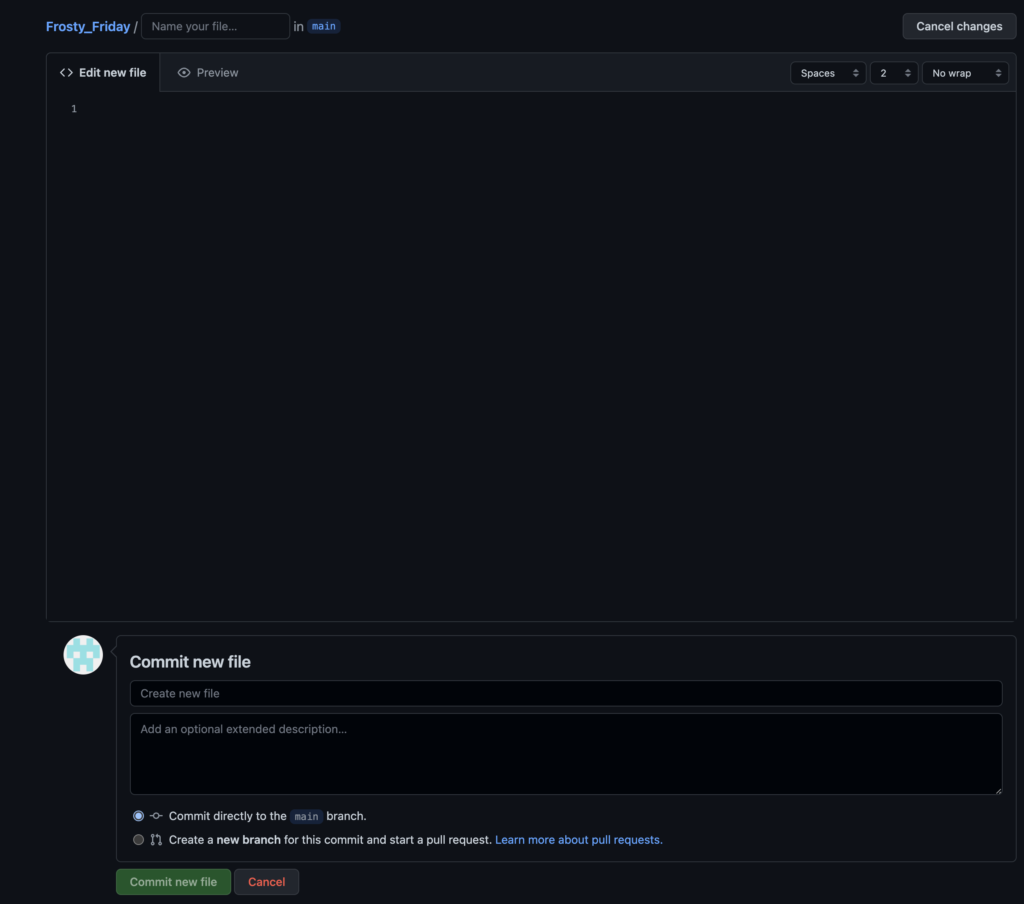
Add the code that you want to share and name the file at the top (Tip: want to put your files into folders ? Simply add the foldername/filename instead of just a filename).
Press Commit new file and you’re all done 🙂
